Source: CapCut
CapCut, a free online video editor, empowers you to transform your collection of photos into a stunning and engaging photo videos. Whether you want to showcase your travel adventures, compile memories from a special event, or create a visually appealing slideshow, CapCut offers a range of features to bring your photos to life.
In this step-by-step guide, we will walk you through the process of using CapCut to create a captivating photo video that will captivate your viewers. Let’s dive in and unlock the full potential of your photos with CapCut!
Step 1: Sign Up and Launch CapCut
- Visit the official website of CapCut in your web browser.
- Create a free account or log in if you had previously created one.
- Once logged in, launch CapCut to access the video editing interface.
Step 2: Import Photos
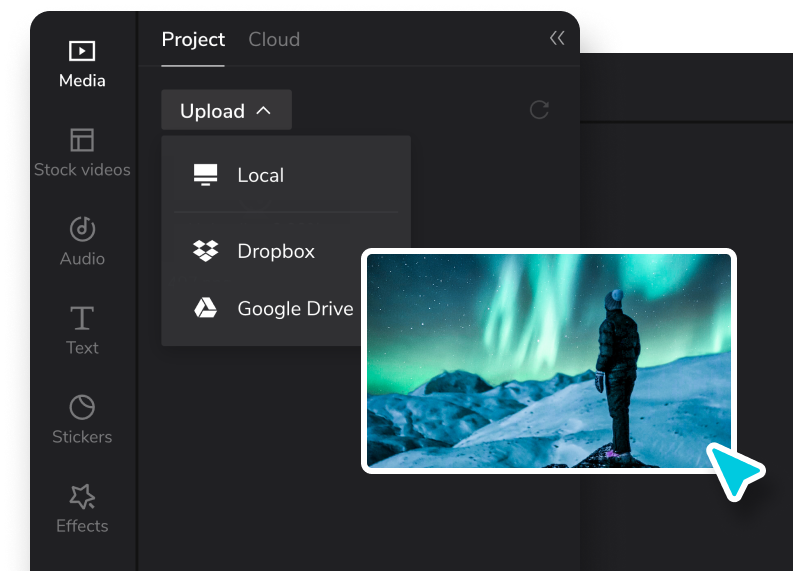
Source: CapCut
- Click “Import.”
- Choose “Photo” from the options.
- Select the photos you want to include in your video from your computer and click “Open” to import them into CapCut.
Step 3: Arrange and Customize Photos
- Drag and drop the imported photos onto the timeline at the bottom of the interface to arrange their order.
- To customize the duration of each photo, click on the photo on the timeline and drag its edges to adjust its length.
- You can also add effects, filters, and transitions to your photos by clicking on them and choosing from the available options in the sidebar.
Step 4: Add Music

Source: CapCut
- Click on the “Import” button again, but choose “Audio” from the options this time.
- Select the music file you want to use from your computer and click “Open” to import it into CapCut.
- Drag the imported audio file onto the timeline and align it with your photos.
- To trim or adjust the volume of the music, click on the audio clip on the timeline and use the available controls.
Step 5: Apply Text and Titles
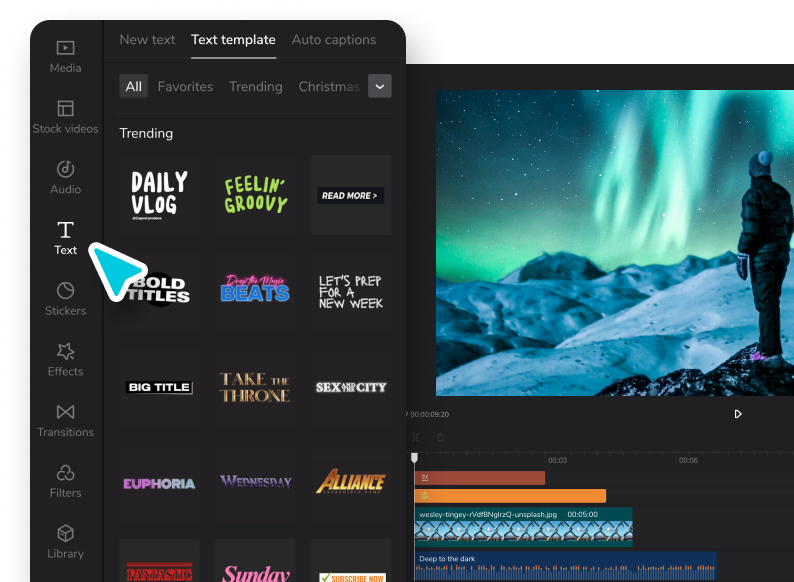
Source: CapCut
- Click “Text,” its symbolized with a capital “T.”
- Choose the desired text style and click on it to add a text layer to your video.
- Customize the text by typing in your desired text and selecting the font, size, color, and position.
- To animate the text, click on the text layer on the timeline, and choose an animation effect from the options provided.
Step 6: Enhance with Effects and Filters
- Tap “Effects.”
- Browse through the available effects and filters and click on the one you want to apply.
- Adjust the intensity or customize the effect settings to suit your preferences.
- Try different effects and filters for a desirable photo-video look.
- To apply the same effect to multiple photos, select all the photos on the timeline to which you want to apply the effect and click on the effect in the sidebar. The effect will be applied to all the selected photos simultaneously.
- It’s also important to check your background video before proceeding further because sometime the background might contain unwanted objects. Use a video background remover to erase such unwanted backgrounds.
Step 7: Add Transitions
- Click on the “Transitions” tab in the sidebar.
- Browse through the available transitions and choose the one that fits your video style.
- Drag and drop the chosen transition between two photos on the timeline to apply it.
- Adjust the duration of the transition by dragging its edges to make it shorter or longer.
- Use different transitions between photos to create smooth and visually appealing transitions.
Step 8: Crop and Rotate Photos
- Click on a photo on the timeline to select it.
- Tap “Crop.”
- Adjust the cropping frame by dragging the edges or corners to select the desired portion of the photo.
- To rotate the photo, click the “Rotate” button in the toolbar and choose the desired rotation option.
- Repeat the process for other photos if you want to crop or rotate them as well.
Step 9: Add Motion and Pan Effects
- Click on a photo on the timeline to select it.
- Click on the “Motion” button in the toolbar above the timeline.
- Choose a motion effect from the available options, such as zoom in, zoom out, or pan.
- Adjust the motion path by dragging the handles or keyframes on the photo preview window.
- Apply motion effects to different photos to create dynamic and engaging transitions between them.
Step 10: Fine-tune the Video
- Review your photo video by playing it in the preview window.
- Make any necessary adjustments to the timing, effects, transitions, or other elements.
- Use the toolbar options, such as “Cut,” “Copy,” and “Paste,” to refine the video by removing or duplicating specific portions.
- Utilize the “Undo” and “Redo” buttons to revert or reapply changes as needed.
Step 11: Adjust Video Settings
- Click on the “Settings” button at the interface’s top right corner.
- In the settings panel, you can adjust various video settings such as aspect ratio, frame rate, and resolution.
- Choose the appropriate settings based on your intended use or platform for sharing the video.
- Take note that higher resolution and frame rate settings may require more processing power and storage space.
Step 12: Preview and Export
- Click on the “Play” button in the preview window to preview your complete photo video.
- Ensure that all the elements, effects, transitions, and timings are to your satisfaction.
- Once you are satisfied, click on the “Export” button in the top right corner.
- Choose the desired video resolution and format.
- Select the output destination on your computer and click “Export” to start the rendering process.
- Wait for CapCut to process and export your video. The time required will depend on the length and complexity of your video.
Conclusion
By following these additional steps in the CapCut video editing process, you can further enhance your photo video with effects, transitions, cropping, motion, and other fine-tuning options. CapCut provides a user-friendly interface and various creative tools to help you create visually stunning photo videos. Enjoy exploring and experimenting with the features, and let your creativity shine through your final video creation.